Choosing a Sensor Street Light for an international project involves more than comparing prices and wattage. Buyers must examine sensing accuracy, solar performance, lighting distribution, battery chemistry, and long-term service support. A product that works well in a quiet village may respond poorly on a busy coastal road. Site conditions matter.
This guide presents 10 practical buying tips for global buyers. It reflects common procurement lessons from outdoor lighting projects, including sample testing, supplier verification, and installation reviews. Check the sensor’s detection range at the intended mounting height. Confirm whether the light supports dimming, motion activation, and timed operation. Review battery capacity at the coldest expected temperature, not only in ideal weather. Ask for photometric files, ingress protection data, warranty terms, and documented quality controls. Local electrical, environmental, and safety requirements should also be confirmed before purchase.
Small details often create major costs. A narrow beam can leave dark areas between poles. A poorly sealed housing may collect moisture after heavy rain. A replacement battery may be unavailable in the destination market. Request a complete specification sheet. Then compare it with a physical sample.
No checklist is perfect. Some performance claims require independent verification, especially when suppliers use different testing conditions. Buyers should record trial results, installation height, road width, and daily operating hours. Clear evidence supports better decisions and more reliable cooperation. Sensor Street Light selection is not simply a product choice. It is a decision about safety, maintenance, energy use, and years of public service.
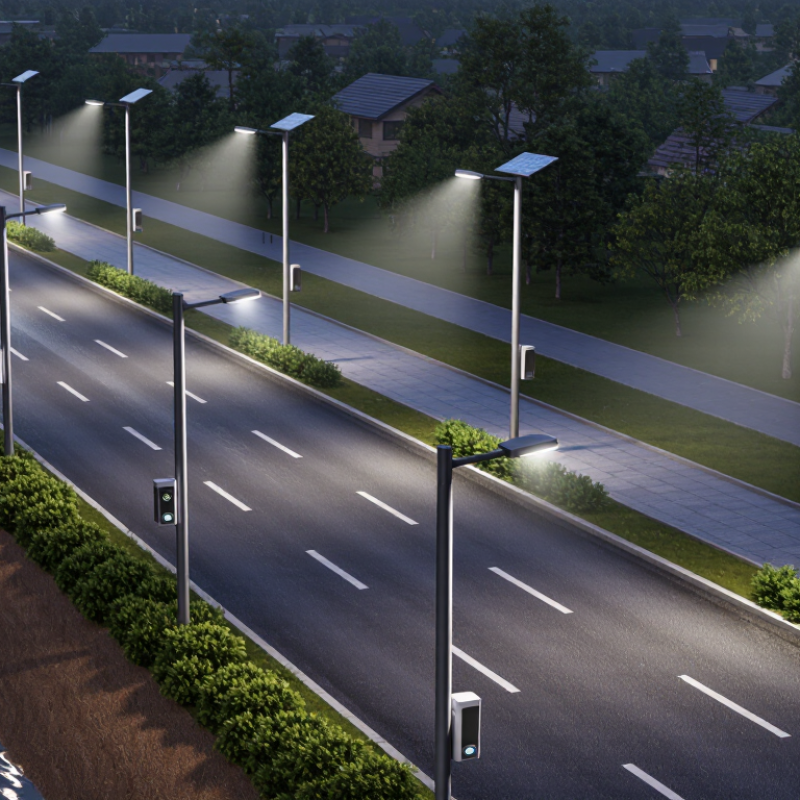
10 Sensor Street Light Buying Tips for Global Buyers
Define Lighting Needs: CIE Road Classes, Lux Targets, and 10 Buying Criteria
A reliable purchase begins with the road, not the fixture. Classify traffic speed, density, pedestrian activity, and security risk using relevant CIE road classes. M classes usually require luminance planning. C and P classes commonly use illuminance targets. Do not guess the lux level. Confirm local standards, mounting height, spacing, surface reflectance, and maintenance factors. A bright test area can still hide dark gaps.
Check these ten criteria: target lux or luminance, uniformity, glare control, optical distribution, LED efficacy, color temperature, sensor accuracy, ingress protection, impact resistance, and service access. Review the photometric file, not only marketing figures. Compare measured output after thermal operation. Ask whether motion dimming causes sudden changes. Drivers should support stable dimming and suitable surge protection. Solar projects also need battery capacity, autonomy, panel sizing, and winter performance.
Field conditions are rarely perfect. Trees grow into the beam, dust dulls lenses, and installers may alter spacing. I have seen a technically efficient lamp fail because its optic missed a junction. Small details matter. Request a night trial, inspect uniformity from several viewpoints, and record lux readings at road edges. Warranty terms should state lumen maintenance, battery replacement, spare availability, and response times. A lower purchase price may become expensive when access equipment and replacement labor are ignored.
| No. | Category | Road Class / Buying Criterion | Recommended Specification or Design Target | Useful Data and Benchmark | Buyer Verification Method |
|---|---|---|---|---|---|
| 1 | CIE / EN Road Class | M1 – high-speed, important traffic route | Use maintained average road luminance as the primary design metric, not illuminance alone. | Typical starting value: 2.0 cd/m²; overall uniformity commonly specified at Uo ≥ 0.40. | Confirm the applicable national version of EN 13201 or local road-lighting standard and request a photometric calculation. |
| 2 | CIE / EN Road Class | M2 – major urban or connecting road | Specify luminance, longitudinal uniformity, overall uniformity, glare limit, and threshold-increment requirements. | Typical starting value: 1.5 cd/m²; overall uniformity commonly Uo ≥ 0.40. | Check pole spacing, mounting height, road width, pavement reflectance, and calculated luminance distribution. |
| 3 | CIE / EN Road Class | M3 – ordinary urban arterial or distributor road | Balance safety, uniformity, energy use, and adaptive dimming for variable traffic conditions. | Typical starting value: 1.0 cd/m²; overall uniformity commonly Uo ≥ 0.40. | Review a site-specific lighting simulation rather than selecting wattage from road width alone. |
| 4 | CIE / EN Road Class | M4–M6 – lower-speed, local, or lightly trafficked roads | Use lower maintained luminance only when traffic speed, volume, geometry, and pedestrian risk justify it. | Typical starting values: M4 0.75, M5 0.50, and M6 0.30 cd/m². Confirm local requirements. | Obtain written class justification and verify that dimming does not reduce safety below the maintained target. |
| 5 | Lux Target | C and P classes – intersections, pedestrian areas, cycleways, and residential streets | Use horizontal or semi-cylindrical illuminance where luminance-based M classes are unsuitable. | Common design ranges are approximately 7.5–50 lux for conflict areas and 2–15 lux for pedestrian or local areas; exact values depend on the adopted standard and class. | Measure a calibrated grid after installation and compare maintained values, not only initial lux. |
| 6 | 1. Sensor Selection | Motion, microwave, PIR, photocell, or combined sensor | Select detection technology according to road speed, mounting height, weather, and required detection zone. | Specify detection range, detection angle, trigger threshold, hold time, fade-up time, and standby level; avoid abrupt 0–100% switching. | Conduct night testing for vehicles, cyclists, and pedestrians under rain, fog, and low-temperature conditions where applicable. |
| 7 | 2. LED Performance | Luminous efficacy and light output | Compare delivered luminaire output, not LED-chip output or nominal wattage. | A practical specification range is about 120–180 lm/W at luminaire level, subject to optics, temperature, and drive current. | Request LM-79-style photometric data, total input power, lumen output, and test temperature. |
| 8 | 3. Lifetime and Reliability | LED module, driver, and thermal management | Specify maintained lumen output, operating temperature, driver life, and replaceable components. | Common targets include L70 ≥ 100,000 hours for the LED system and a driver rated for the intended ambient temperature and switching cycle. | Review thermal test reports, failure-rate assumptions, warranty exclusions, and spare-part availability. |
| 9 | 4. Environmental Protection | Ingress protection, impact resistance, and corrosion resistance | Choose enclosure and coating for coastal salt, dust, snow, heat, and vandalism exposure. | Typical outdoor requirements are IP66 for the luminaire and IK08–IK10 where impact risk is significant. | Check certification scope, gasket quality, salt-spray evidence where relevant, and operating temperature range. |
| 10 | 5. Surge and Electrical Safety | Surge protection, power quality, and electrical compliance | Match protection to local grid conditions, overhead lines, lightning exposure, and inspection rules. | Specify surge protection in kV, power factor, total harmonic distortion, input voltage, frequency, and protective-earth requirements. | Require independent electrical test documentation and verify replaceable surge-protection modules where practical. |
| 11 | 6. Optical Design | Beam distribution, glare, and spill light | Select roadway optics based on pole spacing, setback, lane width, mounting height, and surrounding properties. | Specify BUG or equivalent glare classification, upward-light control, cutoff requirements, and target uniformity. | Review IES or equivalent photometric files and complete a calculation using the actual road geometry. |
| 12 | 7. Color and Visibility | CCT, color rendering, and visual comfort | Choose color characteristics according to safety, ecology, residential comfort, and local policy. | Typical outdoor choices are 2,700–4,000 K with CRI ≥ 70; lower CCT may reduce short-wavelength content and perceived glare. | Approve a sample at night and confirm CCT tolerance, chromaticity stability, and any environmental-lighting limits. |
| 13 | 8. Controls and Interoperability | DALI-2, 0–10 V, Zhaga, NEMA, or wireless control | Avoid proprietary lock-in where long-term maintenance and multi-vendor replacement are priorities. | Define dimming profile, time-clock behavior, fault reporting, cybersecurity, communication coverage, and manual override. | Test controller compatibility, data ownership, API access, firmware policy, and operation during network loss. |
| 14 | 9. Energy and Adaptive Dimming | Energy consumption and sensor-based lighting levels | Use a documented schedule such as background, detection, and recovery levels without violating the maintained lighting class. | Model annual energy from actual wattage, operating hours, dimming percentage, standby load, and local electricity tariff. | Compare measured kWh, trigger frequency, false activations, and nighttime lighting levels during a pilot installation. |
| 15 | 10. Installation and Total Cost | Mechanical fit, maintenance, warranty, and lifecycle cost | Confirm mounting diameter, tilt adjustment, cable entry, access method, spare parts, and safe maintenance procedures. | Calculate total cost of ownership from purchase price, installation, energy, inspections, failures, replacement parts, and end-of-life disposal. | Require installation drawings, torque values, warranty terms, service response time, and a minimum multi-year maintenance plan. |
| Important design note: M-class roads are normally assessed by maintained luminance in cd/m², while C- and P-class areas are commonly assessed by illuminance in lux. The values above are practical starting points for procurement and must be confirmed against the road geometry, pavement reflectance, traffic conditions, local regulations, and the adopted edition of the relevant lighting standard. | |||||
We’re here to help and answer your questions.